I know we’re all anxious to see my closet painted, and I’m getting closer and closer to that every day. I’ve been stuck in these paint prep steps for days now, and I’d love nothing more than to see that beautiful blue-green color go on these cabinets. But all of these steps I have to do before painting really are the most important parts of the process.
Sadly, it seems like these are the steps that most people want to skip over. I’ll never forget when the Chalk Paint craze took over years ago. One of the selling points was that you don’t have to sand before painting. You could just slap that paint right over any finish, and it would look beautiful, or so we were told. That drove me crazy, because the fact of the matter is that if you slap paint on a rough surface or a surface that hasn’t been prepped in any way, your paint finish is going to look awful. The painted surface can only look as good as the surface underneath it. Paint doesn’t magically make cracks, holes, uneven surfaces, rough surfaces, or other imperfections disappear.
And that’s exactly why I take so much time in the prep stage before I paint anything, whether it’s a piece of furniture, cabinets, or anything else. One of my favorite people to follow in Instagram is Kayla Payne. She paints cabinets and furniture, and her approach is very similar to my own. I watched the whole process of her painting her own kitchen cabinets not too long ago, and that was almost a month-long process for her just to paint her kitchen cabinets. She did a super high gloss finish, which takes even longer and even more attention to detail that what I’m doing in my closet, but because of all of that attention to detail, her finish turned out amazing.
Anyway, all of that to say that I know I’m stuck in the super boring part of this project, but it’s not a phase that I can rush through. Nor is it a phase that I want to rush through because if I don’t take the time to do these steps correctly and pay attention to the details, the finished project will look like a cheap DIY project. And that’s the last thing I want.
So yesterday, I worked all day long, from around 10:00am to 10:30pm, with an hour break for lunch. And I spent that whole time sanding and then doing a little more priming. And almost all of the sanding I was doing yesterday was by hand.
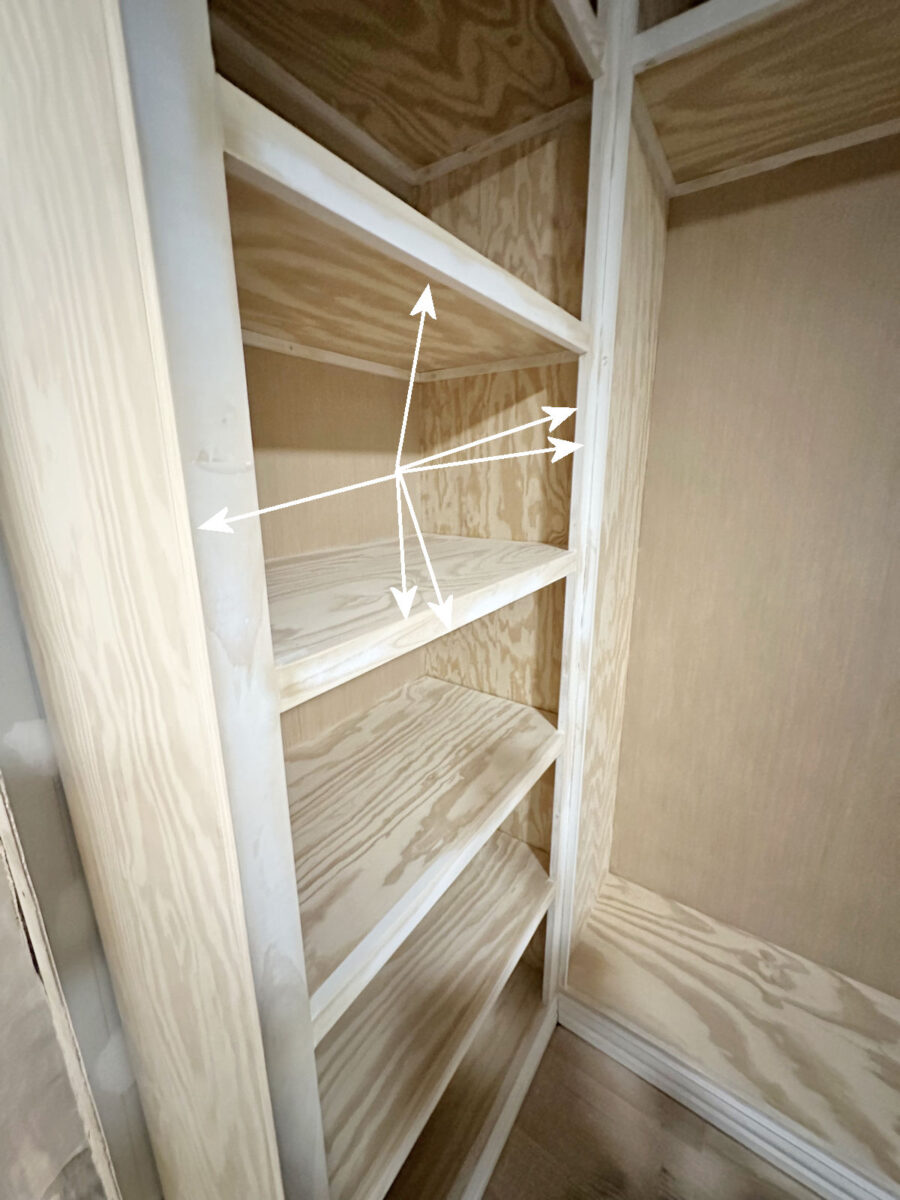
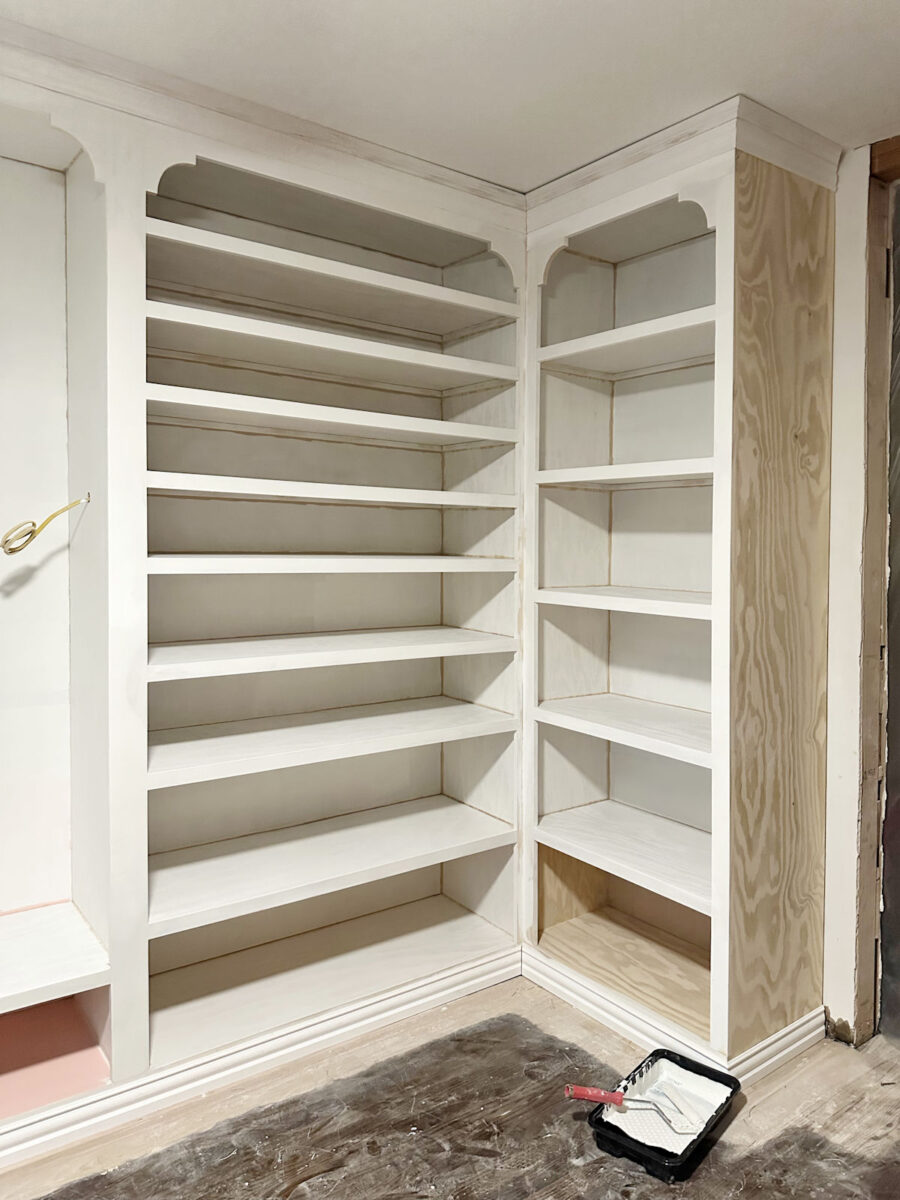
My goal was to take off the sharp edges from all of the trim pieces. And I don’t know if you’ve noticed, but there are a lot of shelves in this room, which means that there are a whole lot of trim pieces that needed to be sanded.
I take the time to do this on all of my projects that I build for two reasons. First, I think it looks better. But second, the factory cut edges on this pre-primed lumber is so sharp that it can literally cut you if you run your hand across it fast enough. Ask me how I know that. 😀 But really, I just don’t like how it looks.

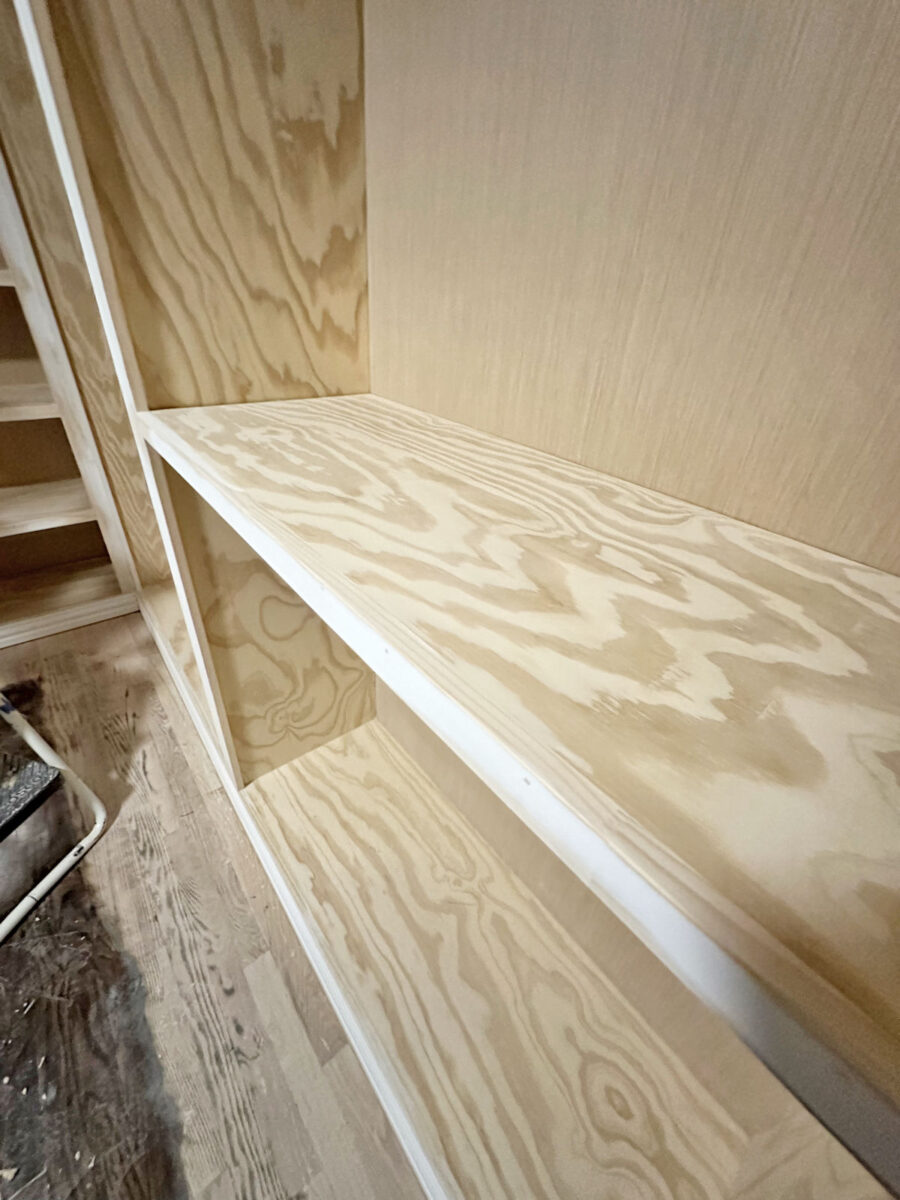
So I start with 80-grit sandpaper to knock down that super sharp edge, and then follow up with 120-grit and then 220-grit sandpaper to get a softer rounded-over edge, which you can see below.

It’s one of those small details that I think makes a huge difference in the finished project. And while I may be the only one who ever notices, that’s enough for me. It’s often hard to tell the difference before it’s primed and painted. Here’s what it looks like after doing all of that sanding but before priming…
But the reason it took so long is because I do all of this by hand. Using a sander for this process can leave gouges in the pieces next to the piece I’m sanding, and it can also take off too much of the corner too fast and leave uneven corners. I have much more control if I do it by hand. And this step needs to be done after all of the shelves and shelf trim have been attached. You don’t want to round over the edges of the cabinet trim and then add the trim on front of the shelves because that will leave a gap between the two pieces that then has to be filled and sanded.
And it also took so long because there’s just so much of it. I sand every single one of the exposed edges. And again, I have a whole lot of shelves and a lot of cabinet trim in this room.
The good news is that I finally got that long and boring process finished at about 9:00 last night, and then I spent the rest of the time until I went to bed priming the right side of the room. I had to laugh because I ran out of primer before I could get that last shelf primed. I still need to prime all of the corners with a brush, but I got (almost) all of the areas primed that could be done with a 6-inch roller.

I have another full, uninterrupted work day ahead of me today, and now that all of the sanding is done, my goal is to get the rest of the priming done by the end of the day.

Addicted 2 Decorating is where I share my DIY and decorating journey as I remodel and decorate the 1948 fixer upper that my husband, Matt, and I bought in 2013. Matt has M.S. and is unable to do physical work, so I do the majority of the work on the house by myself. You can learn more about me here.
Trending Products