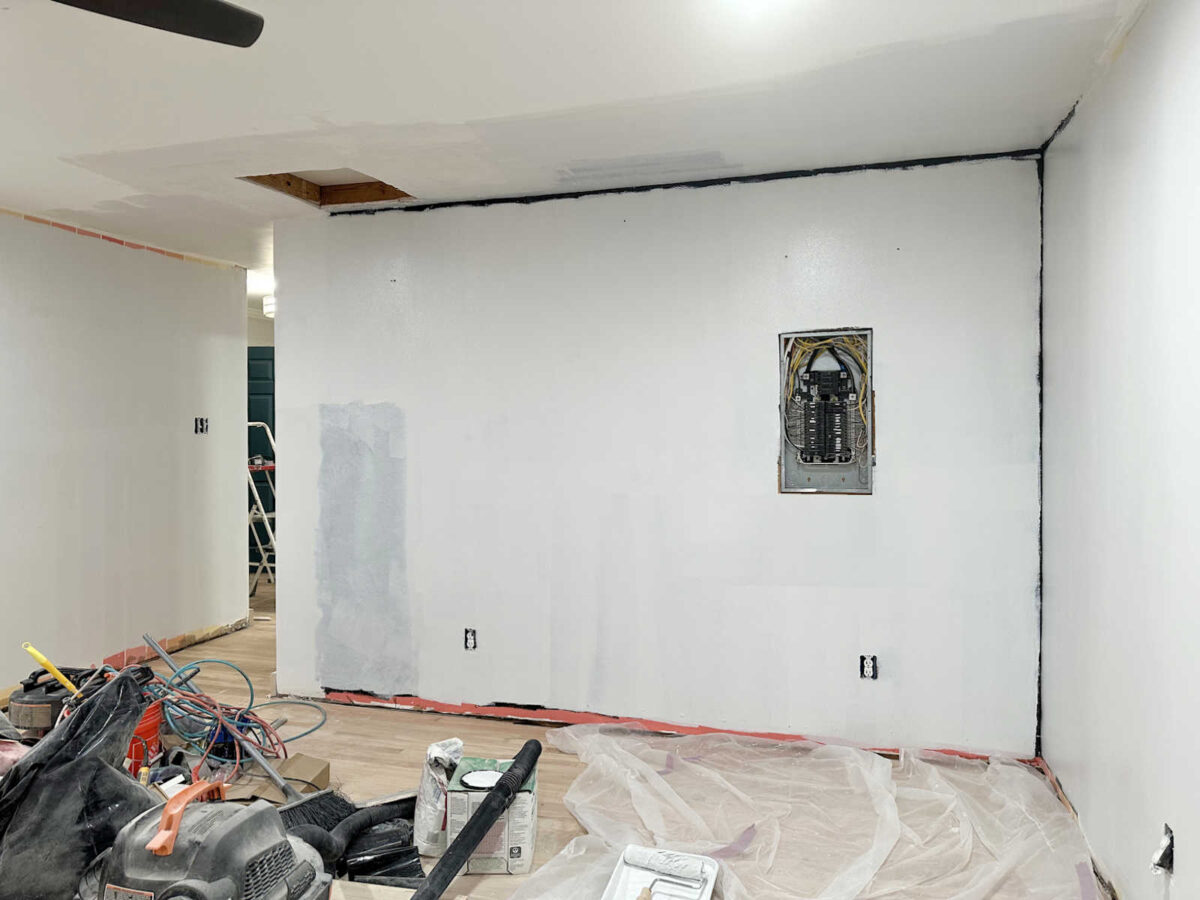
I’ve been working a bit slower these last couple of days because of my injured hand (which you can read about here), but I have managed to make some decent progress in the bedroom and foyer. I got all of the walls primed with at least one coat of primer, and I got a second coat on most of them before I ran out of primer last night.
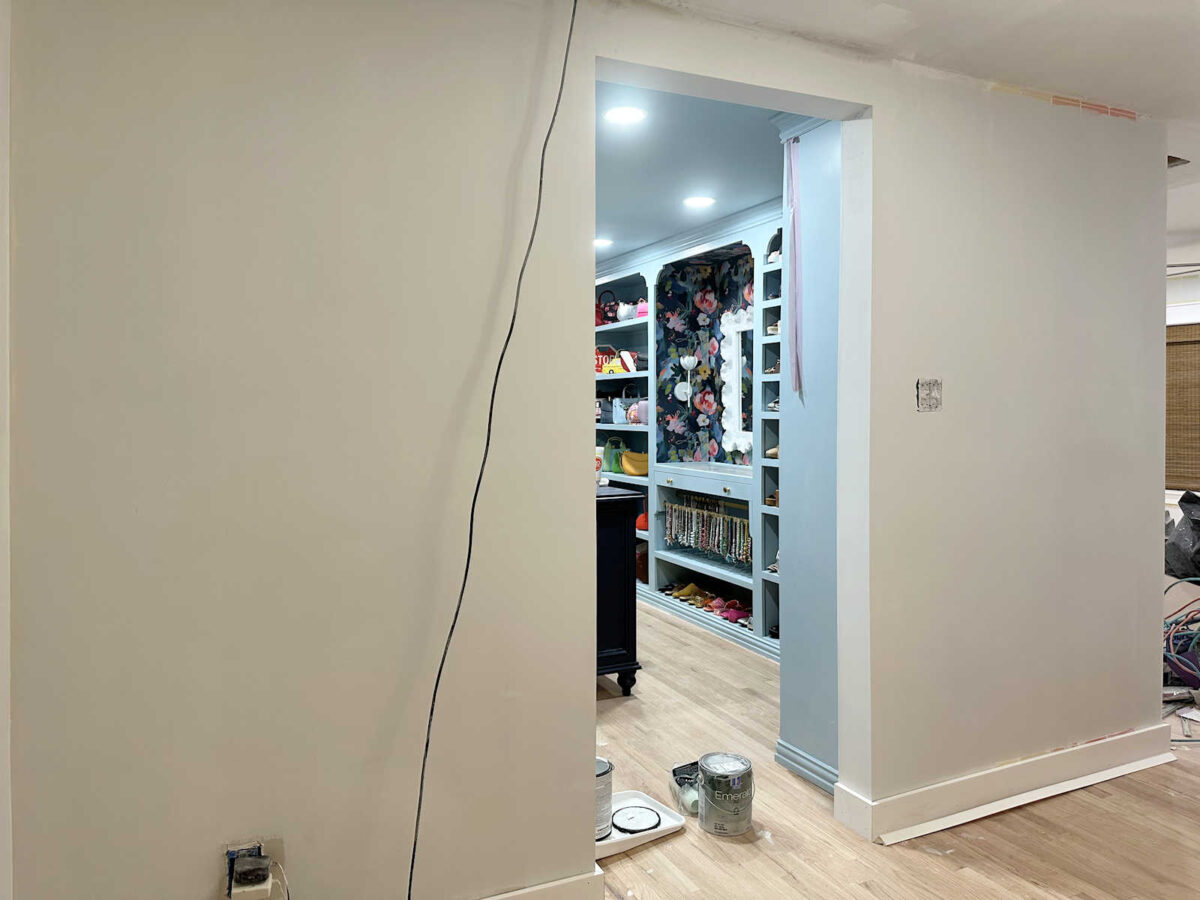
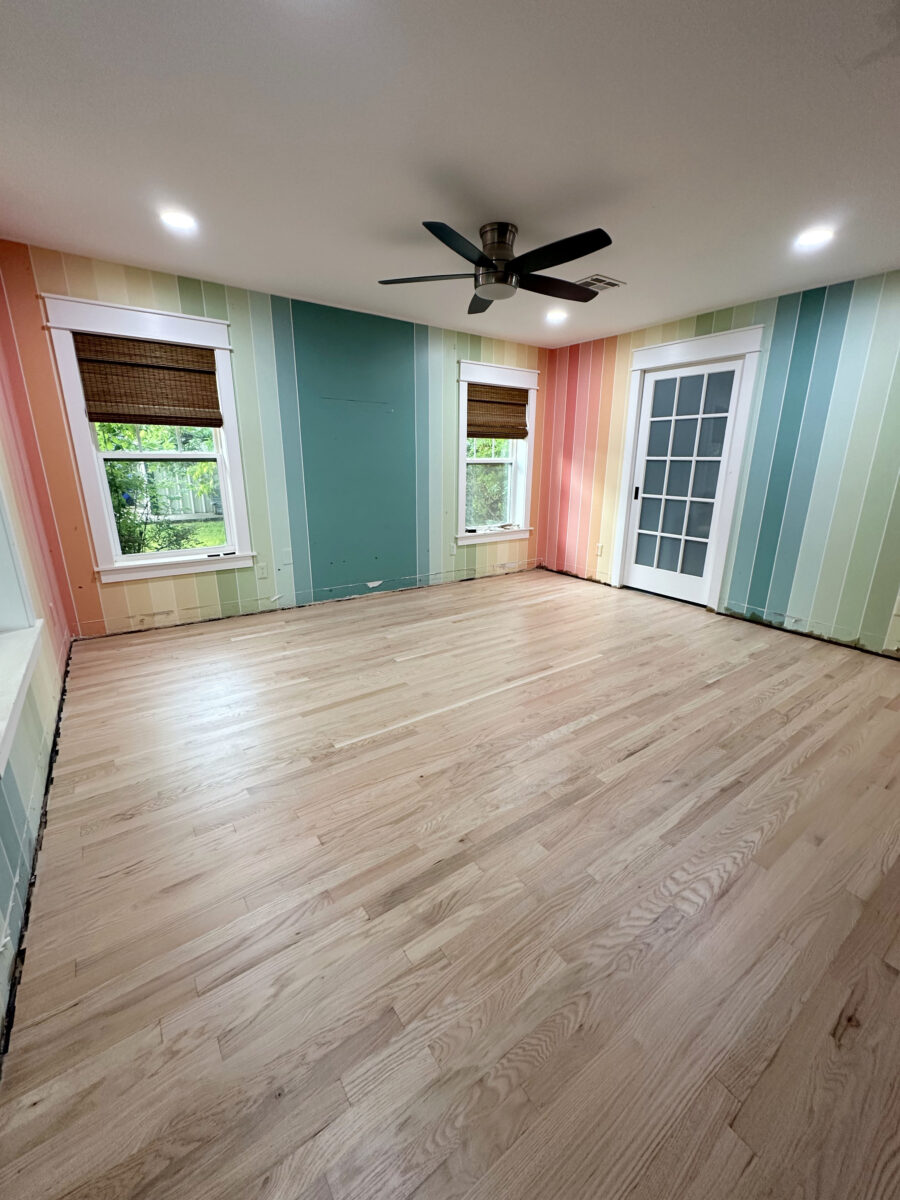
I was amazed at what a difference a couple of coats of primer made. Just seeing the walls around my finished walk-in closet go from this mess…
…to this clean slate, ready for trim and wallpaper was so exciting to me. This feels like I’ve crossed the first big hurdle.
And once I saw those stripes disappear, and I saw the walls all white, I started to get really excited about my plans for these walls.
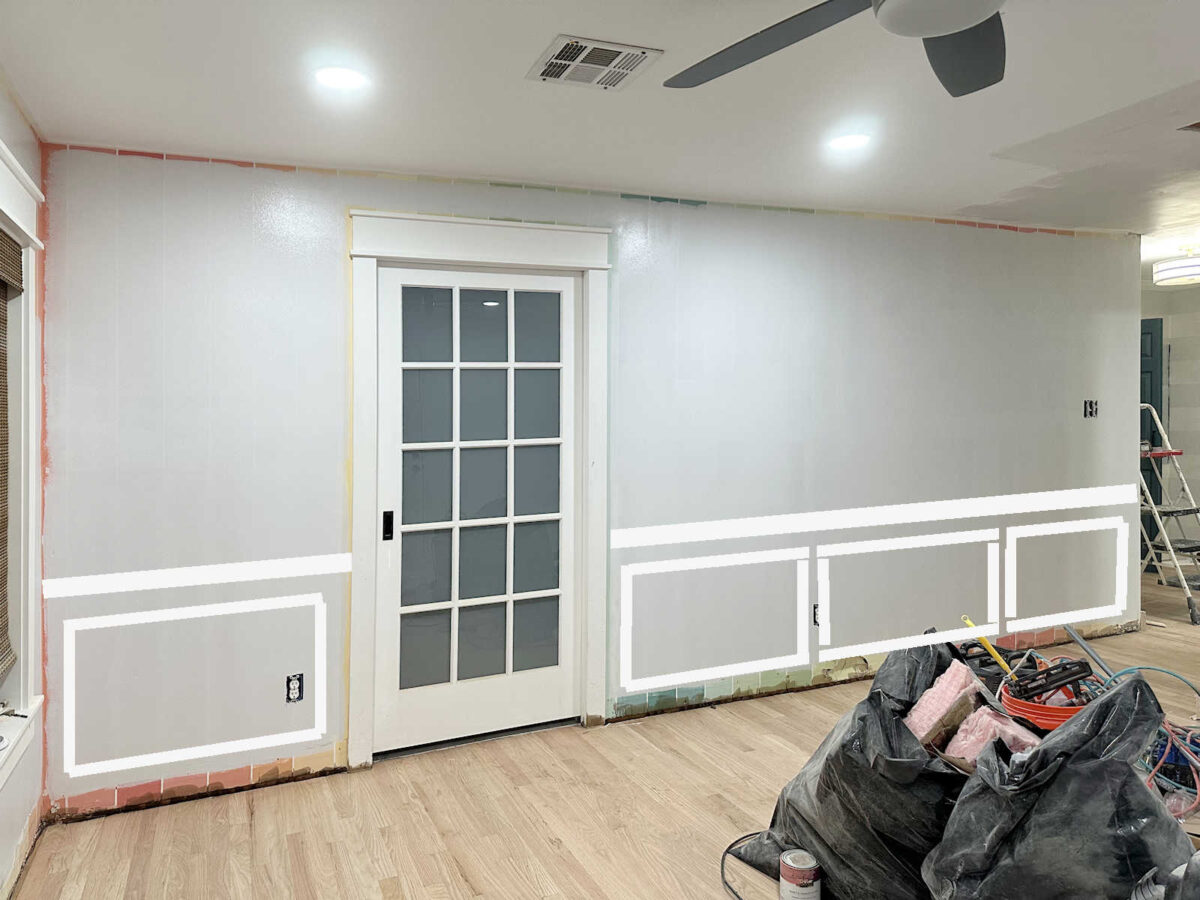
I took some time to plan out my wainscoting project. I decided a while back to go with simple picture frame molding rather than the more laborious judges paneling, but I still needed to map out how may rectangles I want on these walls. The last thing I want is to wind up with the walls looking busy with a lot of little rectangles, but I was also running into the problem of having so many walls that are various widths.
My instinct is to make all of the rectangles as close in size as possible. But the other day, as Matt and I were watching a TV show, I paused the show because the wainscoting in a house grabbed my attention. Rather than having rectangles that were all close to an equal size. They just had one big rectangle on most of the walls. On the really long walls, they were separated into two or maybe three rectangles. But it was clear that whoever installed that wainscoting had no intention of even trying to make the rectangles on any of the walls look the same width. They simply followed the width of the walls, and it looked fantastic!
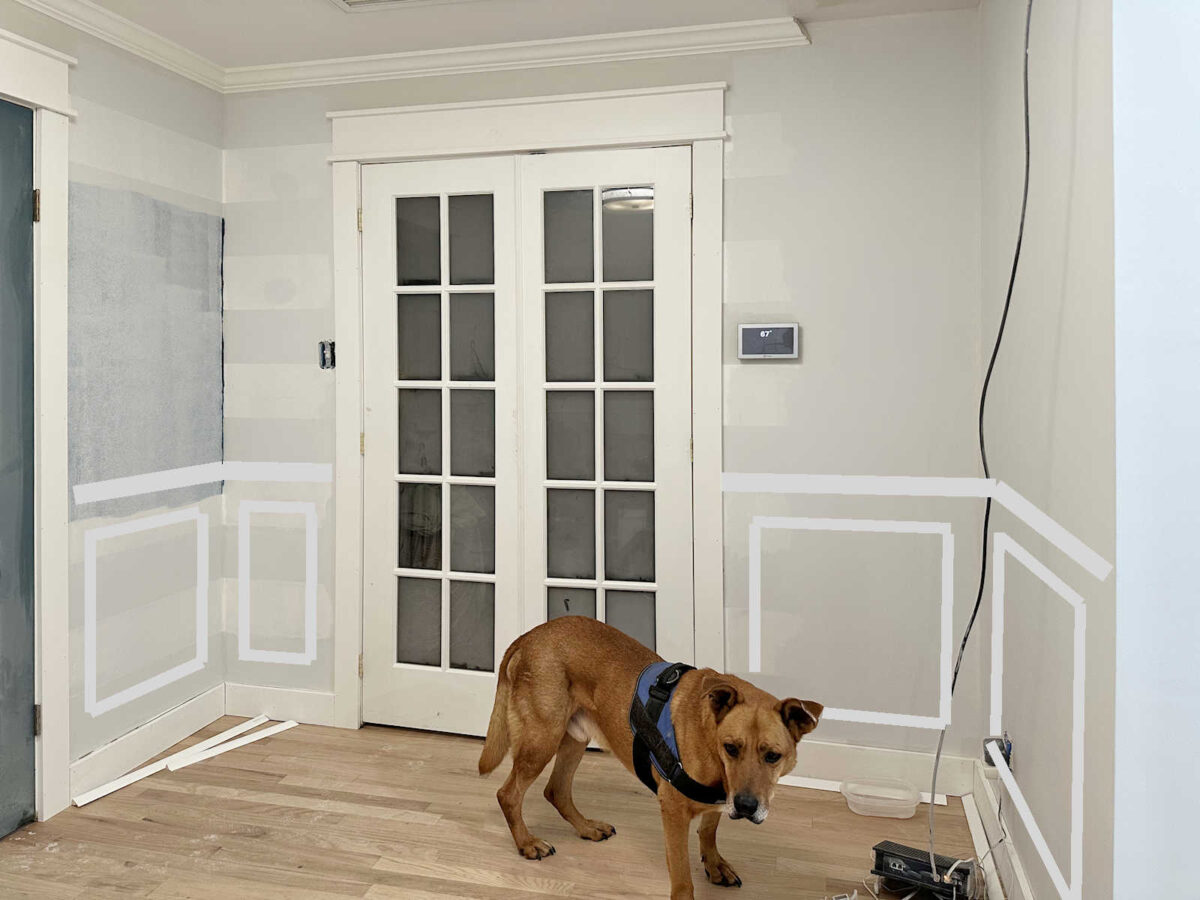
So that’s what I’ve decided to do on most of the walls, regardless of the size. On the walls flanking the walk-in closet, I’ll do one rectangle on each side.
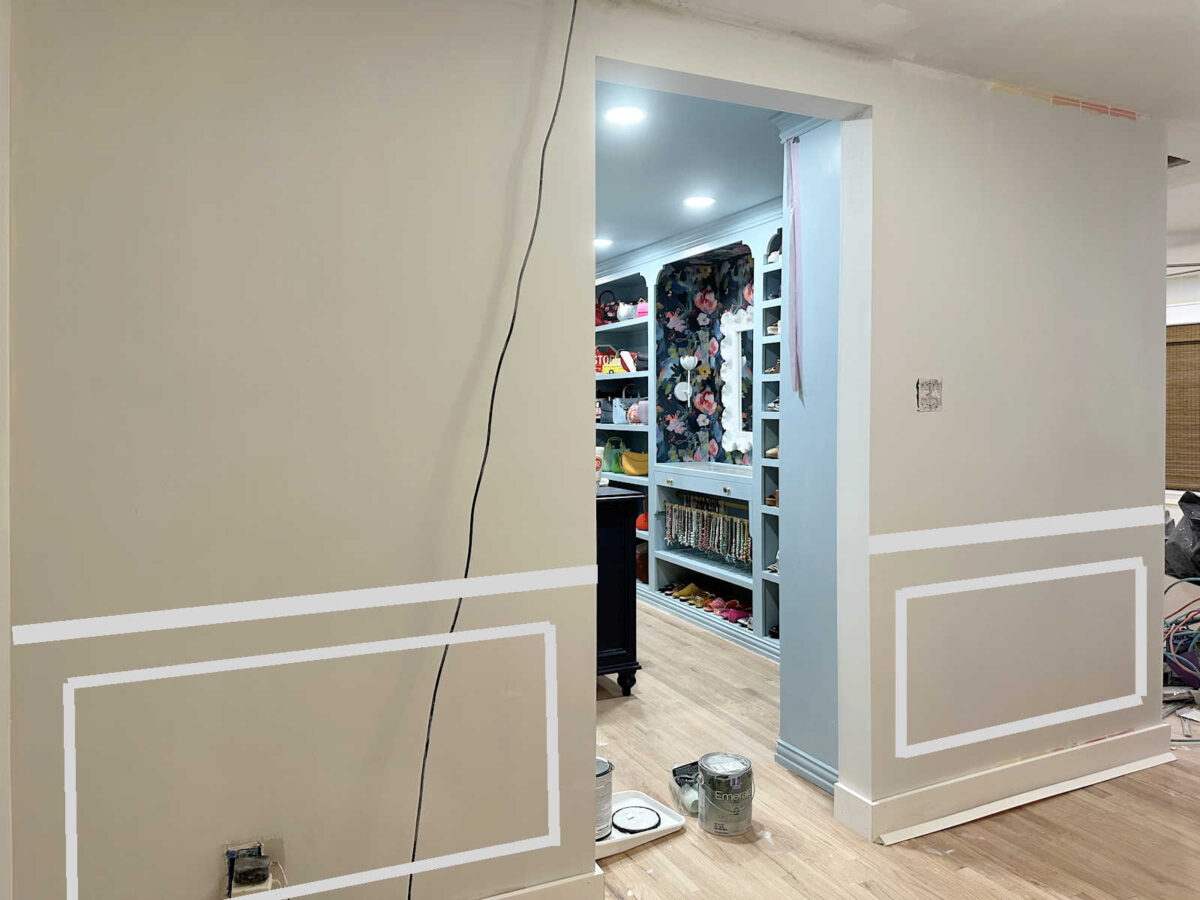
Same goes for the rest of the walls in the foyer. (You can see where I ran out of primer and didn’t get a second coat on.) So these walls…
…will look like this, with one rectangle of picture frame molding per wall.
This is the area that I was the most concerned about because that door is definitely not centered on that wall. There’s nothing I can do about that, though, so I have to live with it.
So I’ll just continue the on with the one rectangle per wall plan, even though that leaves me with one really narrow rectangle to the left of the bedroom doors. I think it’ll look great once it’s all finished.
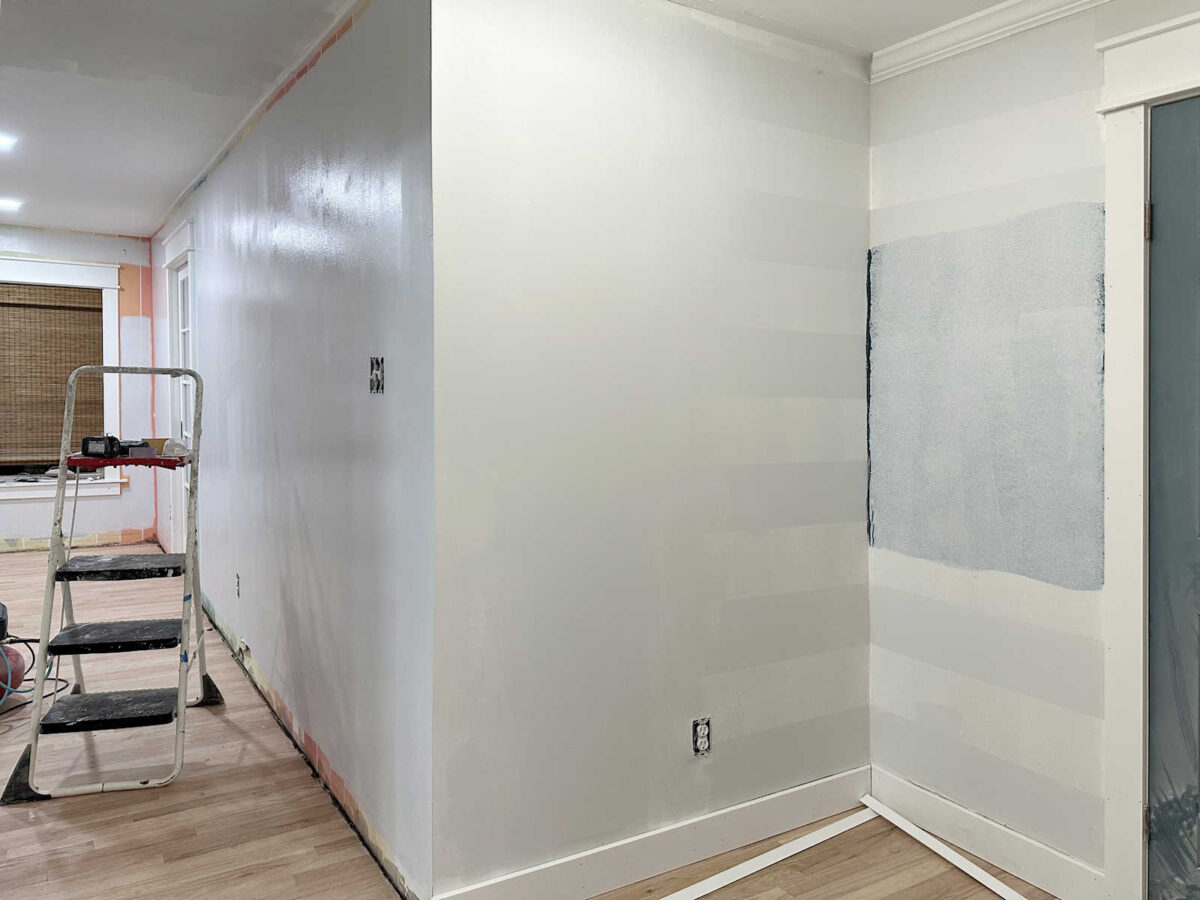
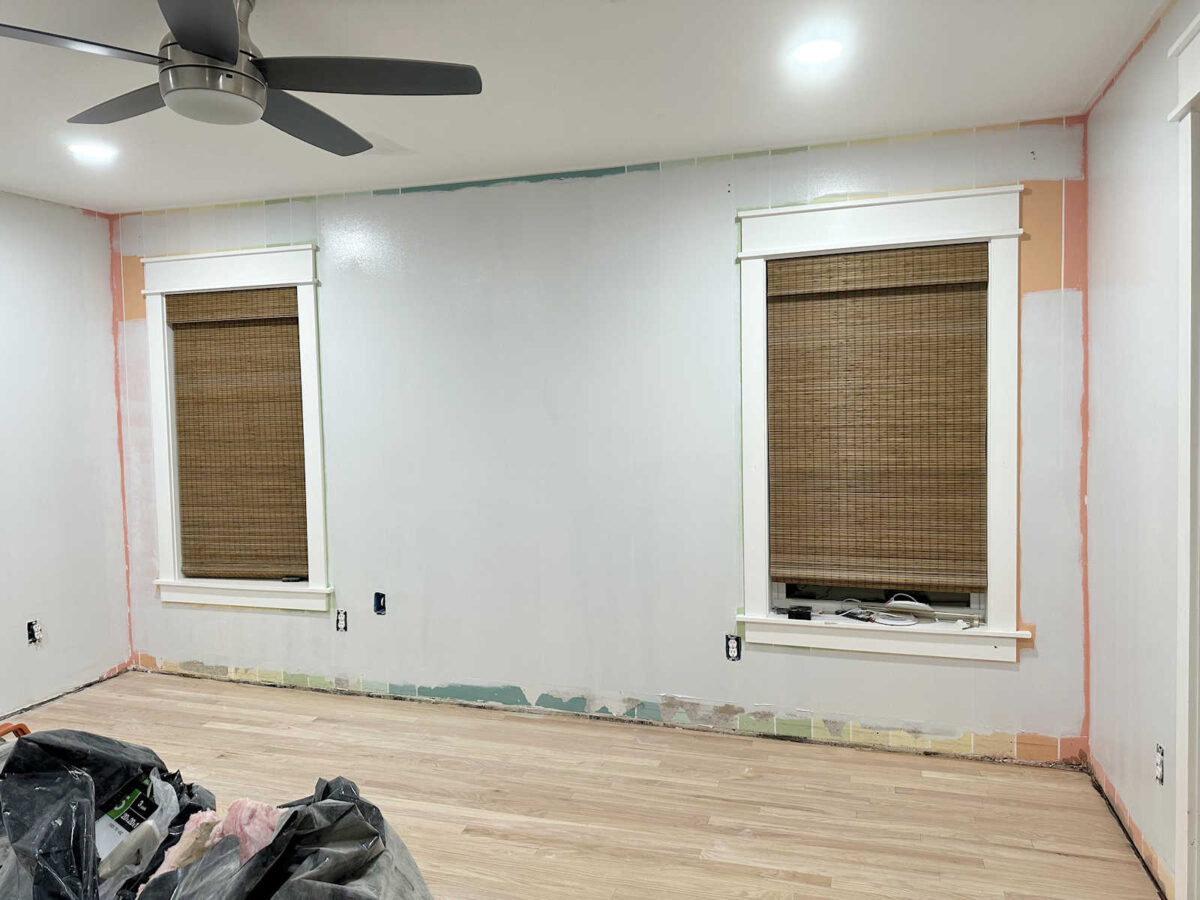
The bedroom walls are a little bit more challenging because I have some pretty wide areas in here. I wasn’t sure whether to keep those to the one rectangle per wall rule or divide those up. (I still need to do some priming with a brush. I only did the parts I could prime with a roller yesterday.)
Since most of this will be behind the bed, I decided to go with one rectangle on this wall as well.
And on this wall, I have yet another off-center door to work around.

But again, because I don’t want things getting too busy, so I’m going to keep these to one rectangle as well.

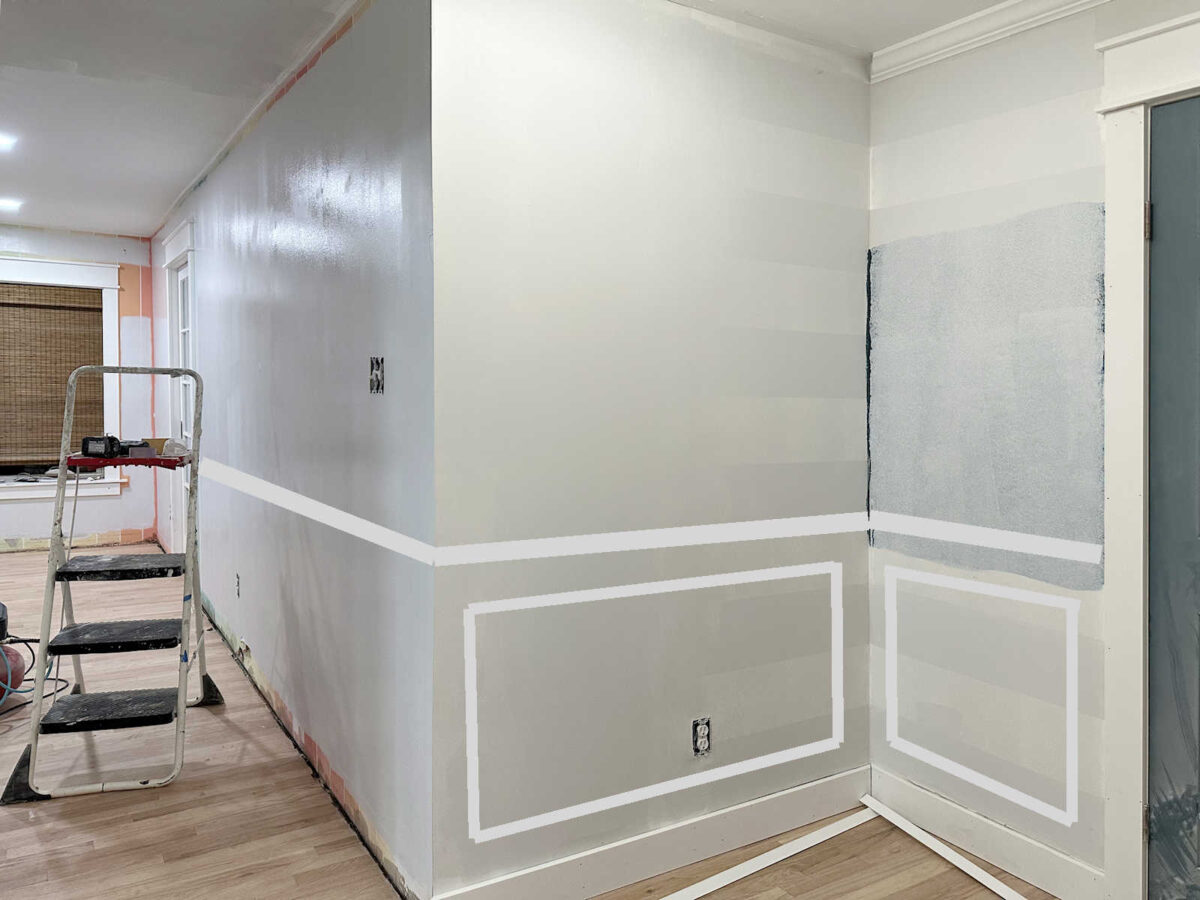
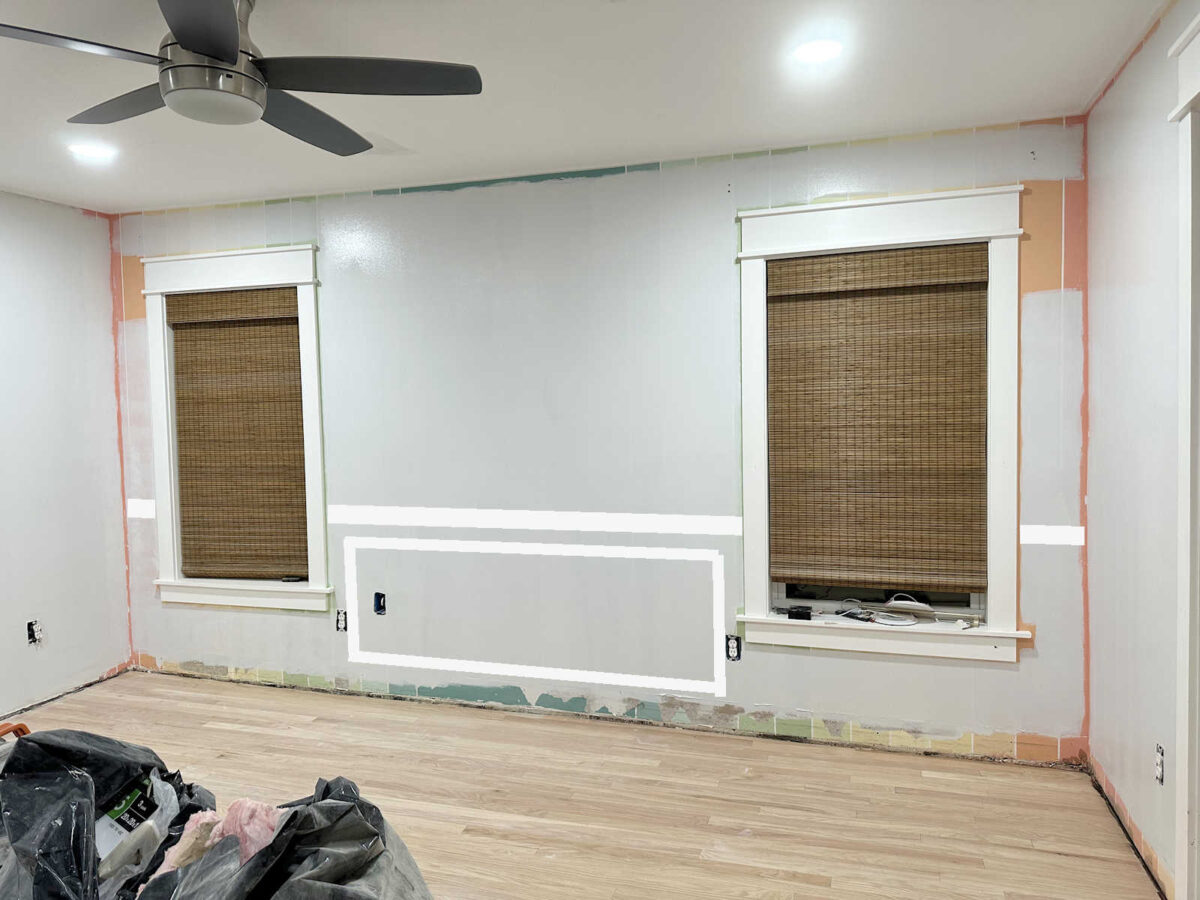
But the other two walls are where I got conflicted. I think that long span of wall to the right of the bathroom door is way too long for one rectangle.
In order to make the rectangles on that wall look somewhat similar, I think I might have to break that long wall up into three rectangles. That’s also the wall that will be the most visible since I don’t have any plans to put furniture against that wall. All of the other walls in the bedroom will have furniture and/or draperies in front of them.
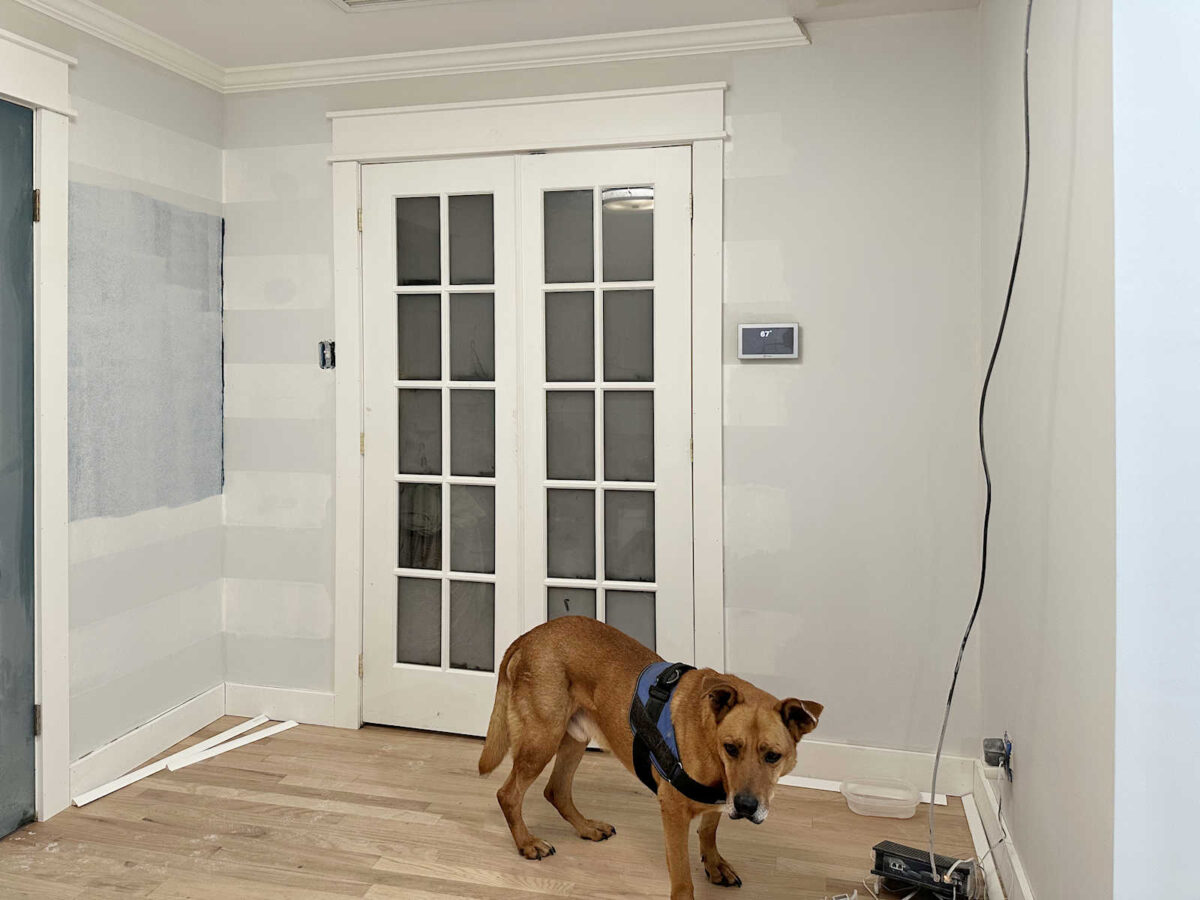
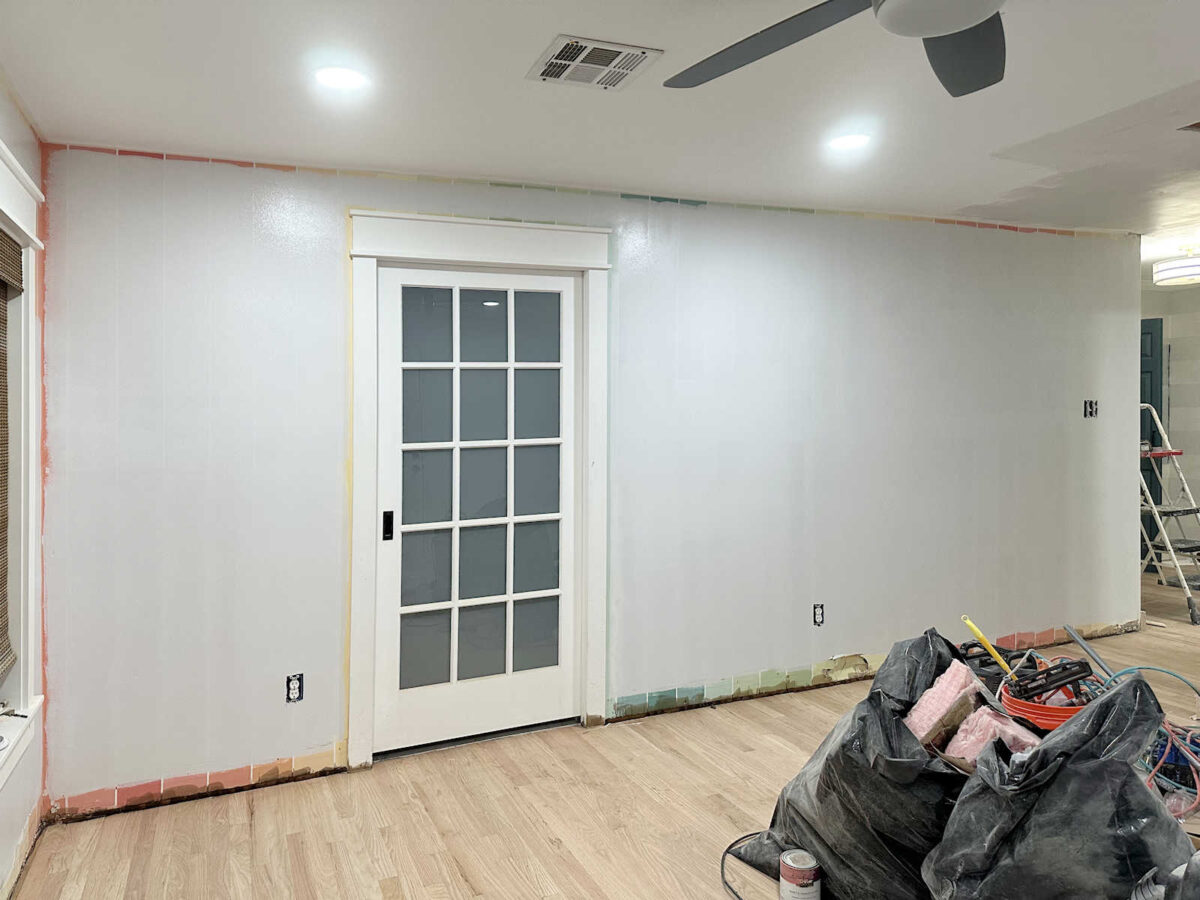
And finally, there’s this last wall. This is the one I’m still not sure about. (And that’s where I ran out of primer.)
I tried it two ways. Here’s what it woud look like with three rectangles…

And here’s what it would look like with two rectangles…

The two rectangles would make them more the size of the one on the wall to the right, and the three rectangles would make them more the size of the ones on the wall to the left. I’m not going to get hung up on this decision, though, because this wall will have furniture against it. But I do want it to look nice and look like I put some thought into it. My initial instinct is to go with two. That way, I don’t take a chance on it looking too busy, and I also don’t take a chance on having those outlets in the way of where the trim needs to go.
So things are moving forward, and there is progress. It’s slow progress because of my injured hand, but at least it’s progress! And I’m so glad to finally have those stripes gone! With clean, white walls, I can really envision my wainscoting and wallpaper plan for these areas, and I’m getting really excited to see these walls finished.
More About Our Master Bedroom
see all master
bedroom diy projects

read all master
bedroom blog posts

Addicted 2 Decorating is where I share my DIY and decorating journey as I remodel and decorate the 1948 fixer upper that my husband, Matt, and I bought in 2013. Matt has M.S. and is unable to do physical work, so I do the majority of the work on the house by myself. You can learn more about me here.
Trending Products